How to do acrylic nails at home: guide, wear time and what you really need
In this article
Note: This article contains affiliate/advertising links. As an Amazon Associate we earn from qualifying purchases. If you click such a link and buy something, we may receive a small commission – at no extra cost to you.
Acrylic nails are considered the supreme discipline of nail sculpting: they are exceptionally sturdy, can be shaped into any style and last for several weeks with proper care. What many people do not know: with a little patience and the right materials, you can do acrylic nails yourself at home. The liquid-and-powder technique takes more practice than a gel manicure, but it rewards you with a robust result that cures entirely without a UV lamp. In this article you will learn what acrylic nails actually are, how they differ from gel nails, which tools you really need and how to proceed step by step at home – including tips on refills, gentle removal and the typical beginner mistakes.
What are acrylic nails?
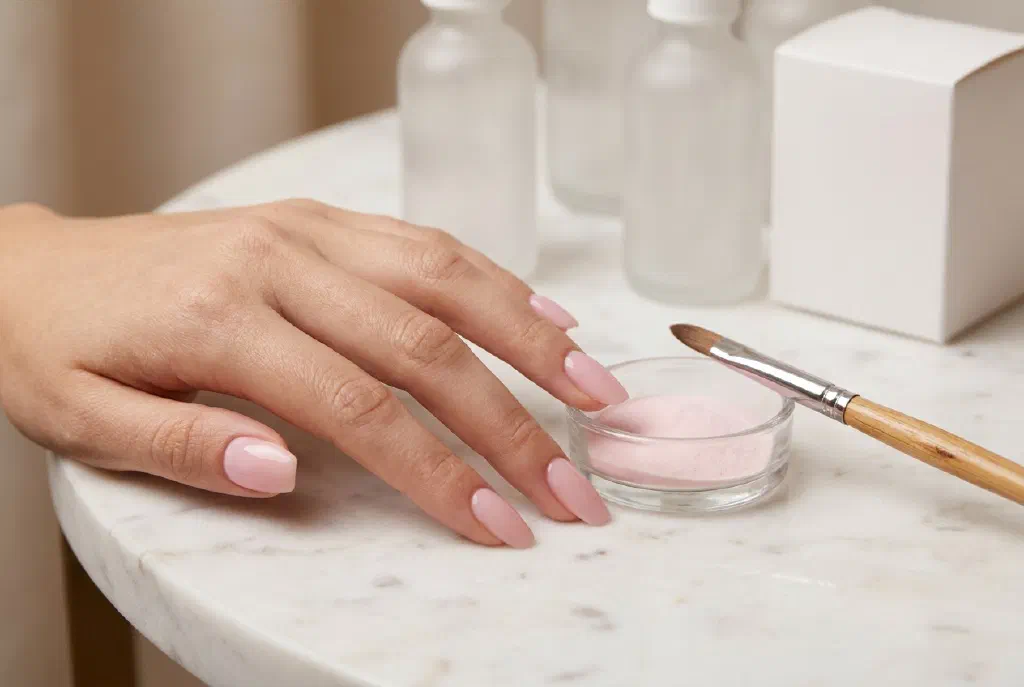
Acrylic nails are an artificial nail enhancement based on a two-component system: a liquid monomer, known as the liquid, and a fine polymer powder. Dip the brush first into the liquid and then into the powder, and a small, mouldable bead forms. This acrylic bead is placed on the nail or a nail form, sculpted into shape – and cures in the air within a few minutes. No UV or LED lamp is needed.
The result is a very hard, resilient surface that is perfect for extensions. That is exactly why acrylic, alongside gel and polygel, is one of the most popular nail extension methods: even long, slim shapes like stiletto or ballerina stay stable with it.
Acrylic or gel: the difference
Both systems build up the nail artificially, but they differ significantly in material and application:
- Curing: Acrylic cures in the air, gel needs a UV/LED lamp. With acrylic, the clock starts ticking the moment the bead touches the nail.
- Hardness: Acrylic becomes harder and stiffer than gel – ideal for long extensions. Gel stays more flexible and feels more natural.
- Smell: The liquid has an intense odour of its own. Always work in a well-ventilated room. Gel is virtually odourless.
- Corrections: Gel can be shaped at leisure before curing, while acrylic is less forgiving of hesitation.
For beginners, gel is often the easier way to start – you can read how in our guide to doing gel nails yourself. For a detailed comparison of both systems with all the pros and cons, see the article acrylic or gel.
The tools you really need
You do not need a full salon setup for your first acrylic set, but a few things are essential:
- Acrylic liquid and acrylic powder: The heart of the system. A clear and a pink powder are enough to begin with.
- Acrylic brush: A pointed natural-hair brush used to pick up and distribute the beads.
- Dappen dish: A small glass container for the liquid.
- Tips or nail forms: Tips are glued on, forms are slid under the natural nail – both extend the nail.
- Files and buffer: A coarser file for shaping, a buffer for mattifying and smoothing.
- Primer and cleanser: The primer improves adhesion to the natural nail, the cleanser degreases beforehand.
- Cuticle pusher: To gently push back the cuticles before you start.
Much of this belongs to the basics of any nail enhancement anyway – you will find an overview in the article on the essential nail design tool kit.
Step by step: doing acrylic nails at home
Allow a good two hours for your first attempts and work at a tidy, well-ventilated spot:
- Prepare the natural nail: Push back the cuticles, shorten the nails and lightly mattify the surface with the buffer. Then degrease with cleanser.
- Apply tip or form: Glue on the matching tip size or slide the form snugly under the free edge of the nail.
- Apply primer: Wafer-thin and only on the natural nail – this provides the necessary adhesion.
- Pick up an acrylic bead: Dip the brush into the liquid, wipe it lightly and draw it through the powder. A small bead forms, which should be allowed to moisten through briefly.
- Place and distribute the bead: Set the bead down in the middle of the nail and distribute it swiftly with the damp brush towards the tip and sidewalls. Let it thin out towards the cuticle, keeping a narrow margin.
- Complete the build-up: Two to three beads per nail are usually enough – one for the tip, one for the middle, one for the area near the cuticle. The highest point sits in the middle of the nail, the so-called apex.
- Let it cure and file: After a few minutes the acrylic is tap-hard. Now shape the nail with the file – our overview of nail shapes shows you which shape suits your hands.
- Finish the surface: Smooth with the buffer and bring to a shine with a top coat or sealing gel. Finally, nourish the cuticles with oil.
Wear time and refills
Well-applied acrylic nails typically last several weeks. As the natural nail keeps growing, a visible gap gradually appears at the cuticle area. That is why a refill is due roughly every three to four weeks: the grown-out area is roughened, cleaned and filled with fresh acrylic, and any lifting spots are carefully removed. This keeps the enhancement stable without you having to start from scratch every time.
Between appointments the rule is: do not use your nails as tools, wear gloves when cleaning and keep the cuticles supple with regular oil – this noticeably extends the wear time.
Removing acrylic nails gently
Acrylic does not come off by itself and should never be ripped or picked off – that always takes layers of the natural nail with it. The gentle method:
- Shorten the length: Trim the artificial extension with a tip cutter or a coarse file.
- File the surface: File off the sealant and part of the acrylic so the remover can penetrate.
- Soak: Soak cotton pads in acetone-based remover, place them on the nails and wrap them with aluminium foil or wraps. After about 15 to 20 minutes the acrylic becomes soft.
- Push off and care: Carefully remove the softened material with a wooden or metal pusher and repeat the process if necessary. Then smooth the nails and oil them generously.
Your natural nail needs some attention after removal. You can read how to strengthen it again in the post on rebuilding the natural nail after enhancements.
Typical beginner mistakes
These pitfalls cost the most nerves at the beginning – and are easy to avoid:
- Wrong mixing ratio: If the bead is too wet, it runs into the cuticle; if it is too dry, it becomes crumbly and adheres poorly. Practise picking up the bead on a practice tip first.
- Acrylic on the cuticle: If you sculpt right up to or onto the skin, the material quickly lifts there. Always leave a narrow margin free.
- Applying too thickly: Chunky nails look unnatural and take forever to file. Work thin instead and place the apex deliberately.
- Poor preparation: Without degreasing and primer, even the most beautiful set will not last. Take as much time for the prep work as for the build-up.
- Impatience when removing: Ripping instead of soaking damages the natural nail. Always allow enough time for removal.
Frequently asked questions (FAQ)
Can I do acrylic nails myself as a beginner?
Yes, with patience and the right materials it is doable. But expect your first attempts not to be perfect: the mixing ratio of liquid and powder and the swift sculpting take practice. It is best to train the bead technique on practice tips before working on your own nails.
Do I need a UV lamp for acrylic nails?
No. Acrylic cures through a chemical reaction in the air – that is one of the biggest differences from a gel manicure. You only need a lamp if you finish with a UV sealing gel instead of an air-drying top coat.
How long do DIY acrylic nails last?
With clean preparation and application, acrylic nails last several weeks. Because the natural nail grows out, the enhancement is refilled roughly every three to four weeks. Lifting at the edges usually points to mistakes in the preparation or too much material near the cuticle.
Which is better: acrylic or gel?
That depends on your priorities. Acrylic is harder, very stable and ideal for long extensions, but demands more speed and practice. Gel is more flexible, low-odour and more beginner-friendly. You will find a detailed comparison in the article acrylic or gel.
How do I remove acrylic nails without damaging the natural nail?
Shorten the extension, file the surface and soak the acrylic with acetone-based remover under foil until it softens. Then it can be pushed off carefully. Never rip it off – that takes layers of the natural nail with it and weakens it unnecessarily.
Does acrylic harm my natural nails?
The enhancement itself is unproblematic when done cleanly. Damage mainly comes from over-aggressive roughening, improper removal or ripping the nails off. If you prep gently, remove correctly and care for your nails with oil in between, your natural nail stays in good condition long-term.